Pay bills or send money to friends and family directly from Bar Harbor Online. You can also set up same-day, future, and recurring payments.
Below are some helpful instructions on how to use Bar Harbor Bill Pay.
Enroll in Bill Pay
1. To enroll in Bill Pay, click on Bill pay from the left menu.

2. Follow the prompts to enroll. (Note: you may be required to re-enter your password for verification purposes.)
Enroll in Notifications
1. Click on Bill pay from the left menu.

2. Click Manage payments.

3. Click My account from the menu at the top of the screen.

4. Click View alerts button in the Notifications box on the right side of the screen.

5. Click the Email and/or Mobile checkbox to the left of the alert(s) you want to receive. (Clicking on the Email checkbox will deliver the notification via the email address shown at the top of the Notifications section. Clicking on the Mobile checkbox will deliver the notification to the mobile phone number shown at the top of the Notifications section.)
Note: To receive a notification when you have a new secure message (including the message that will be sent when a Biller is removed), select the checkbox(s) to the left of Notify me when I have a new secure message.
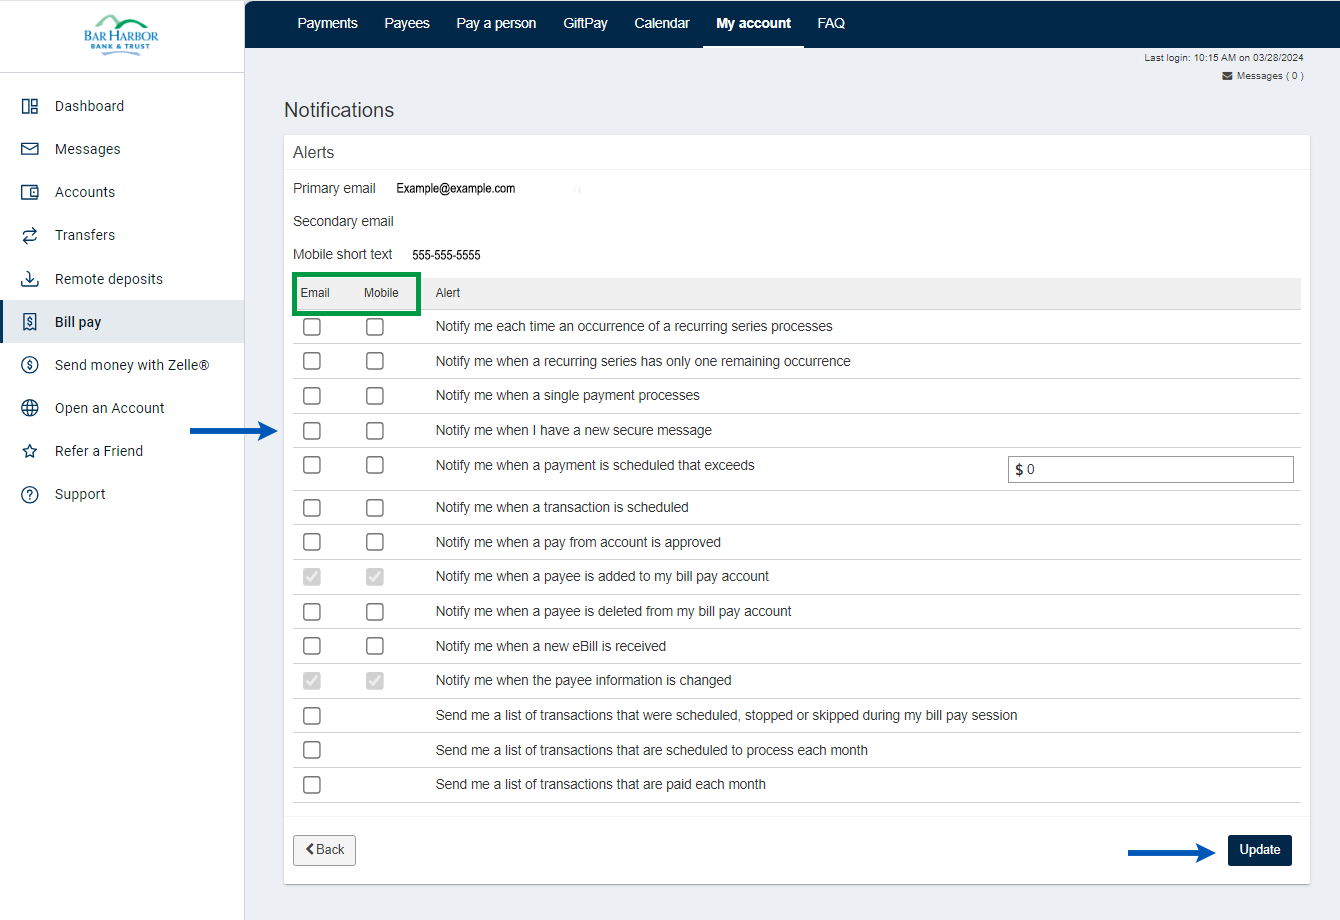
6. Once you have selected the notifications you want to receive, click on the Update button at the bottom right of the screen.
Pay a Company
Set Up Payee
1. Click Bill pay from the left menu.

2. Click on the New Payee button and then click on Company.

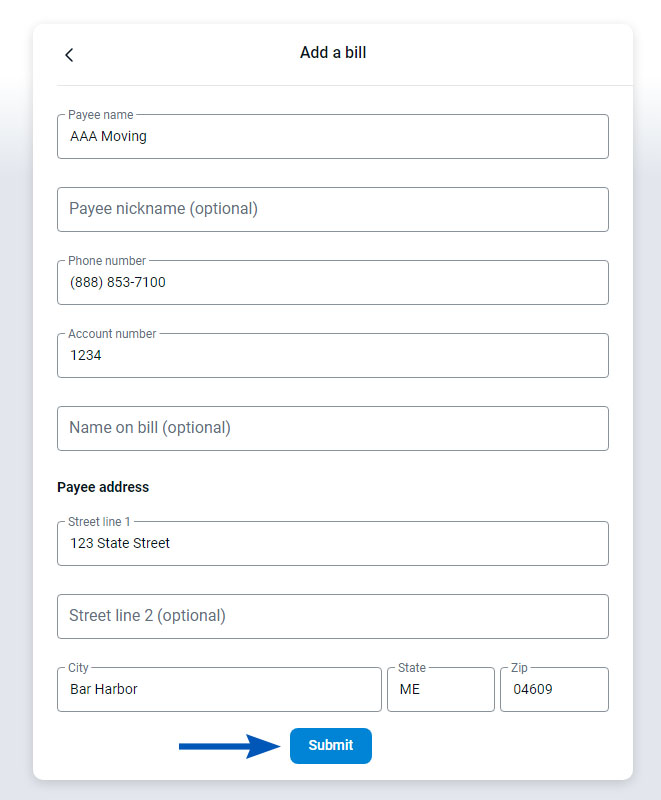
3. Enter the payee’s information and click the Submit button.
Make the Payment
1. Click on the Pay a bill button from the dashboard.

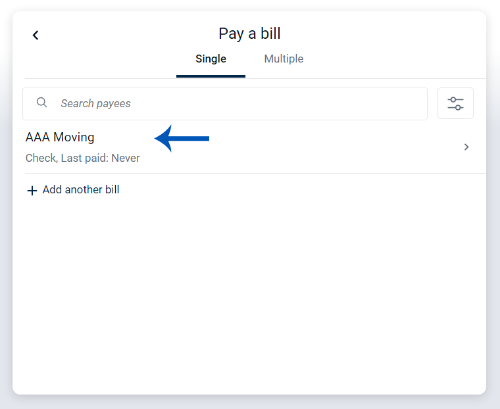
2. Click on the payee you wish to send money to.
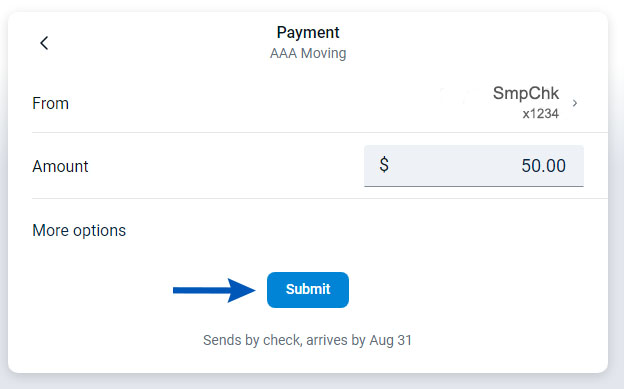
3. Select the account that you would like to pay the bill from (if you have multiple accounts) and enter the amount you would like to pay. (To choose a frequency, date, and make a note about the payment, click on More options.) Click Submit.
Pay an Individual
Set Up Payee
1. Click on Bill Pay from the left menu.

2. Click on the New Payee button and then click on Person.

3. Select the method you want to use to pay the person.
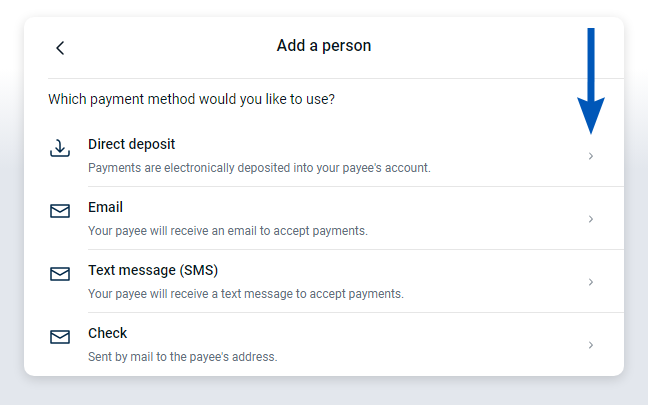
4. Enter the payee’s information and click the Submit button.
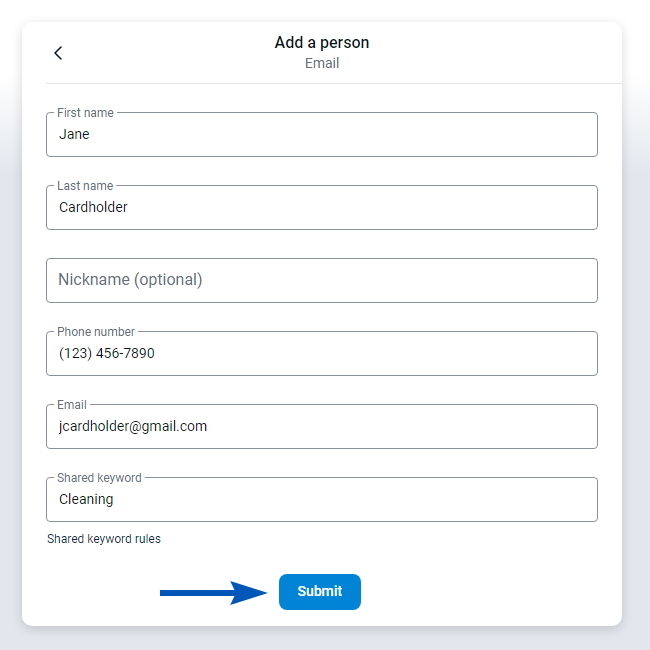
Note: If you are paying a person via email or text message, you will be prompted to create a shared keyword. You will need to provide the shared keyword with your payee before they can enter their account information and accept your transfer. After you submit this information, the payee will receive an email with instructions for setting up their account to accept the funds you are transferring to them. You will not be able to make a payment until the payee has activated their account.
Make the Payment
1. Click on the Pay a person button on the dashboard.

2. Click on the payee you wish to send money to.
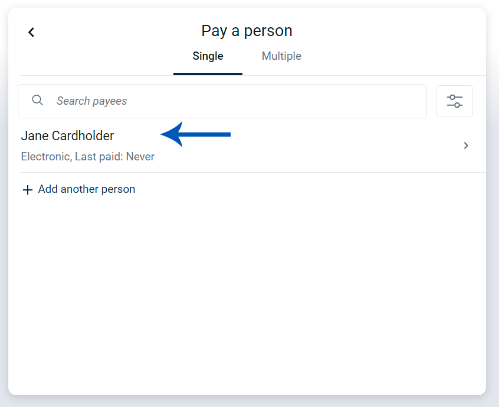
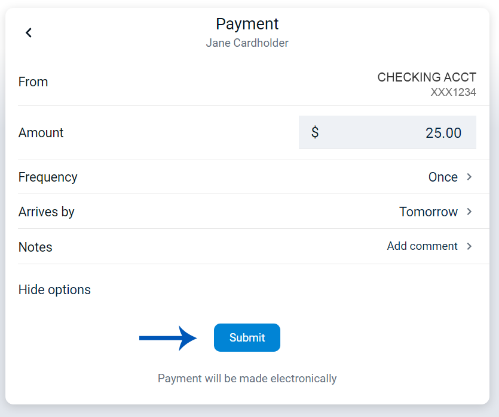
3. Enter the amount you would like to pay. (To choose a frequency, date, and make a note about the payment, click on More options.) Click Submit.
Edit Scheduled Payments
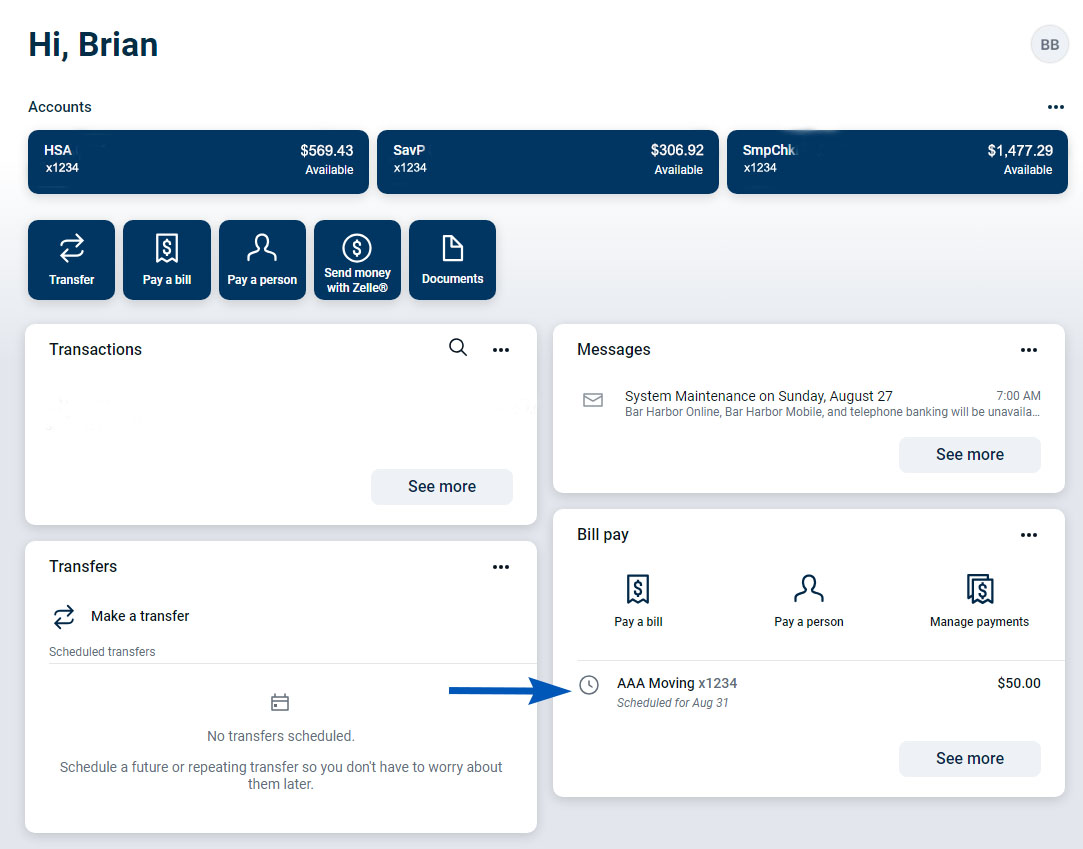
1. A list of your scheduled payments can be found on the Payments card on your dashboard. Click on the scheduled payment you would like to edit.
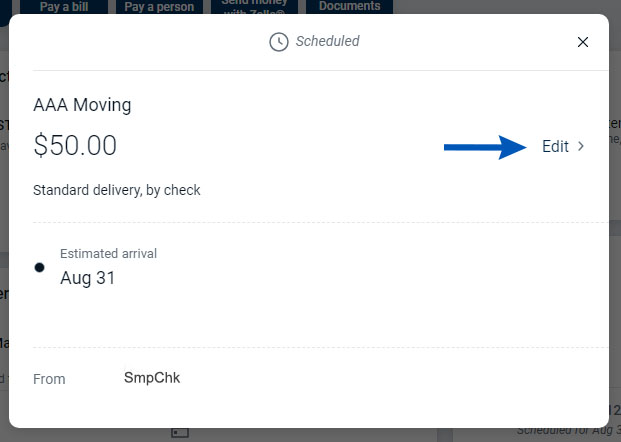
2. Click on Edit.
3. Make your changes and click Save.
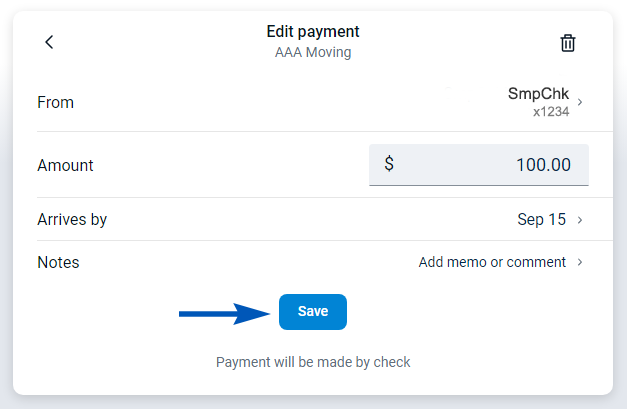
You can also delete payments by clicking on the trashcan in the upper right-hand corner.

